Chocolate Caramel Bars with Salted Pretzel Crust
These chocolate caramel bars hit the spot when you are craving something both sweet and salty!
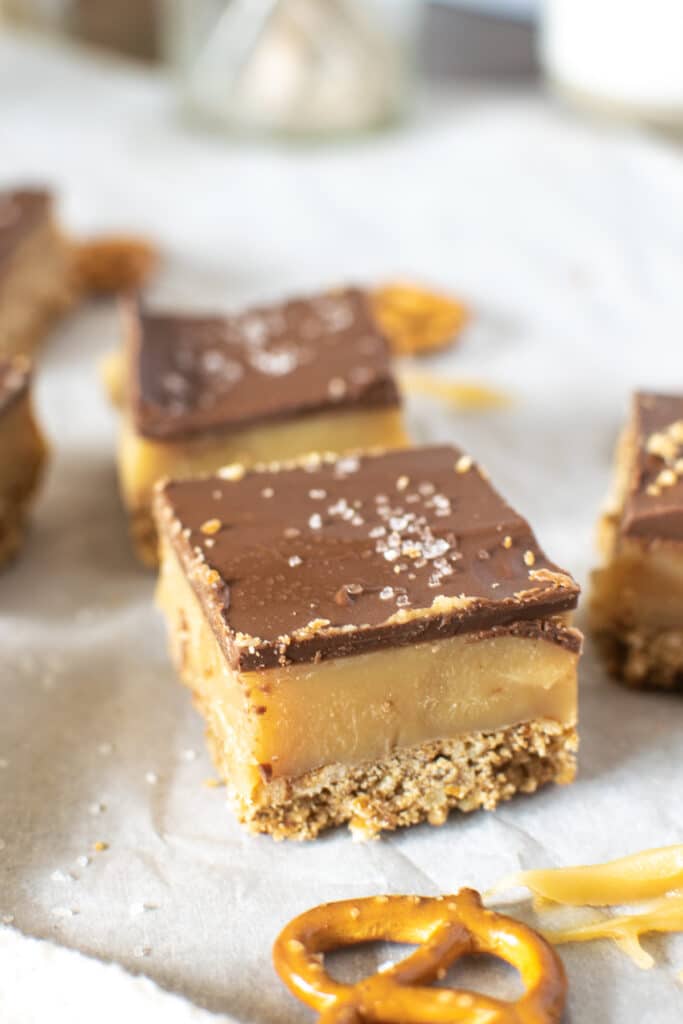
Similar to Millionaire bars, these decadent treats are filled with homemade buttery caramel sauce and smooth milk chocolate. But instead of a shortbread crust, they have a salty pretzel crust giving them that delicious sweet and salty flavour.
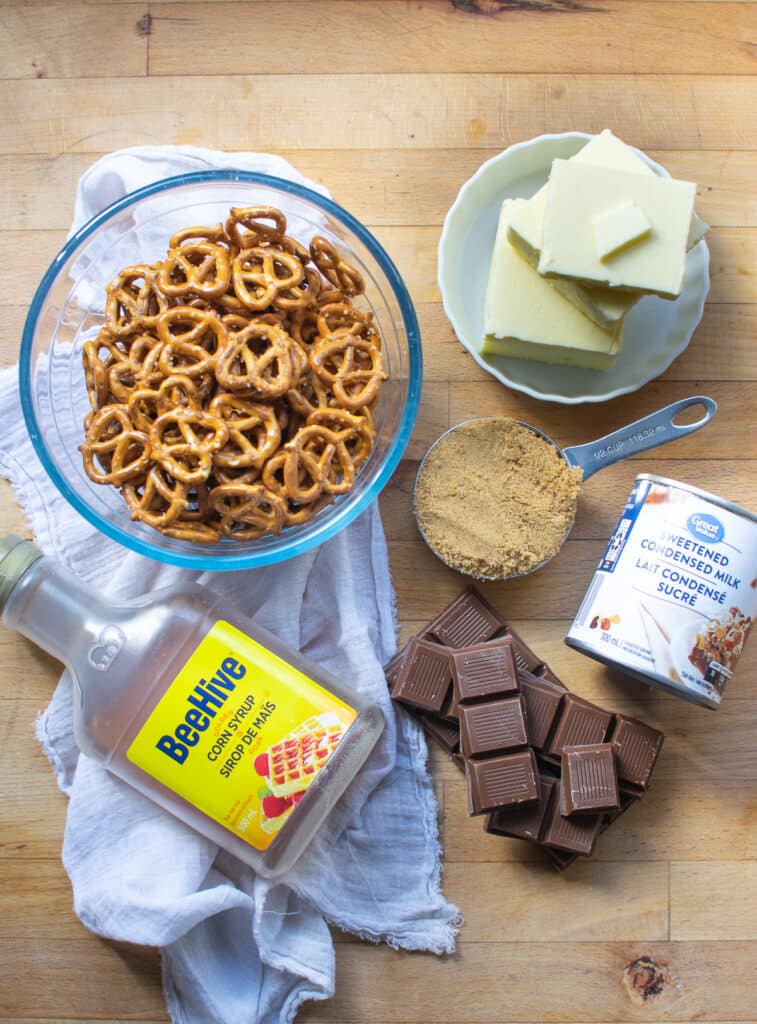
Ingredients for Chocolate Caramel Bars
- butter
- brown sugar
- salted pretzels
- sweetened condensed milk
- corn syrup
- milk chocolate chunks (I always have one or two large Waterbridge Belgian milk chocolate bars from Walmart on hand)
Essential Baking Tools
- 8 inch square baking pan (I have had these Wilton ones for years)
- parchment paper (Costco is a great place to buy it in large rolls)
- measuring cups & spoons
- food processor
- medium sauce pan
- off-set spatula
How to make chocolate caramel bars in 3 easy steps
- Combine pretzel crumbs, 2/3 cup butter and 4 tablespoons brown sugar in food processor and pulse until well combined, press into square baking pan and bake at 350 for 10 minutes
- In a medium saucepan on medium low heat combine 1/2 cup packed brown sugar, 3/4 cup butter, corn syrup and sweetened condensed milk until butter and sugar is melted. Bring to a boil over medium high heat, stirring constantly. Reduce heat to simmer, and cook for 8 minutes stirring constantly. Remove from heat and pour over prepared crust. Refrigerate until firm.
- Melt chocolate over double boiler, allow to cool slightly and spread over set caramel with an offset spatula. Return to refrigerate to chill until chocolate is set.
Tips to making perfect chocolate caramel bars
Mise en place
Mise en place simply means to gather your ingredients. When making these chocolate caramel squares I recommend processing and measuring your pretzel crumbs, and all the other ingredients before you begin.
Benefits of using the mise en place method include
- ensuring you don’t forget an ingredient (or worse, finding out you don’t even have an ingredient you need halfway through!).
- it also helps to keep a clean kitchen as you go. Once you have gathered and measured all your ingredients, put what you don’t need away, clearing your workspace of any unnecessary clutter.
- everything is right at hand as you need it
Stir the caramel mixture constantly
Trust me on this one! When you begin cooking the ingredients for the caramel layer, give it your full attention. Constantly stirring with a heatproof spatula will prevent any crystallizing of the sugars that lead to lumps of burnt sugar throughout your caramel.
Make them a day in advance
Giving the caramel plenty of time to set and firm up, allowing it to chill for as long as possible will result in a nice solid square. Making it a day ahead will ensure it has plenty of time to set.
Use Parchment Paper
Using parchment paper that is goes up over the edges of the pan makes removing the squares a breeze. Nothing stuck to the bottom or edges, and cutting the squares out of the pan prevents damage to the pan itself.
Cut squares with a sharp knife run under hot water
This is my go to trick when cutting any squares that are gooey and can be sticky. Warming up the blade of a sharp chefs knife and carefully wiping with a clean cloth before each cut will ensure nice uniform squares with clean edges.
While these make a delicious treat all year round, I do tend to avoid making these in the heat of the summer months to prevent melting of the chocolate and the caramel from getting too soft from the heat. But, all is not lost! If they do want to make them in the warmer weather, simply serve with a fork to avoid messy hands!
These Chocolate Caramel Peanut Butter Thumbprint cookies are another delicious way to enjoy the combination of yummy caramel and milk chocolate!
More Dessert Recipes You Will Love
Chocolate Caramel Squares
Equipment
- 8 inch square baking pan
- Food Processor
- saucepan
Ingredients
- ⅔ cups plus 3/4 cups softened butter
- 1 ½ cups pretzel crumbs about 1/2 bag pretzels ground in food processor
- 4 tablespoons plus 1/2 cup packed brown sugar
- 3 tablespoons corn syrup
- 14 ounce can sweetened condensed milk 1 1/4 cups
- 7 ounces milk chocolate
Instructions
- Preheat oven to 350 degrees and line an 8 inch square pan with parchment so it extends up over the edges
- Using a food processor, grind pretzels into fine crumbs. Remove crumbs from the food processor and measure 1 1/2 cups of crumbs. Discard or store the rest in an air tight container.
- Pour the measured crumbs back into the food processor and add 2/3 cup butter and brown sugar. Process until well combined. Pour crumbs into prepared baking pan and press down firmly. Bake for 10-12 minutes or until set and just golden. Remove from oven and set aside.
- In a saucepan combine the remaining 3/4 cup butter, 1/2 cup packed brown sugar, corn syrup and sweetened condensed milk. Heat on medium-low until sugar and butter is melted. Increase the heat and bring just to a boil while stirring constantly. Turn the heat to simmer and continue to stir and simmer for 8 mintues, until thickened somewhat. DO NOT STOP STIRRING.
- Remove from heat and pour over prepared crust. Refrigerate until set. About 4 hours.
- Melt chocolate over double boiler, allow to cool slightly and the carefully spread over caramel layer using an off-set spatula. Return to refrigerator until chocolate is set.
- Cut into squares with a sharp knife dipped in warm water.
- Store in the refrigerator up to 5 days or freeze for up to 2 months
Notes
Enjoy
……………………..tune in tomorrow for a super easy bran muffin recipe



Those look really really good!!!
These are two of my favorite things….chocolate and pretzels! Thanks so much for sharing this delicious recipe!
blessings,
karianne
Oh my these look good! I’ll definitely have to give these a try. I could eat one right now!
Oh my gosh those look delicious. Thanks for sharing. I am going to have to put that on my to bake list