
Ikea Hack – Kitchen Cart Edition
Happy Monday everyone! I hope you all enjoyed your weekend. I have been busy with some fun projects and today I am sharing my Ikea Hack – Kitchen Cart Edition!
At the risk of sounding like a broken record. We live in a small house! The problem is, I keep finding really fun dressers or desks or tables that I really want to buy and make them all pretty and fresh, but I simply have no room to put everything.
So I have resorted to updating, refreshing and making over things I already have!
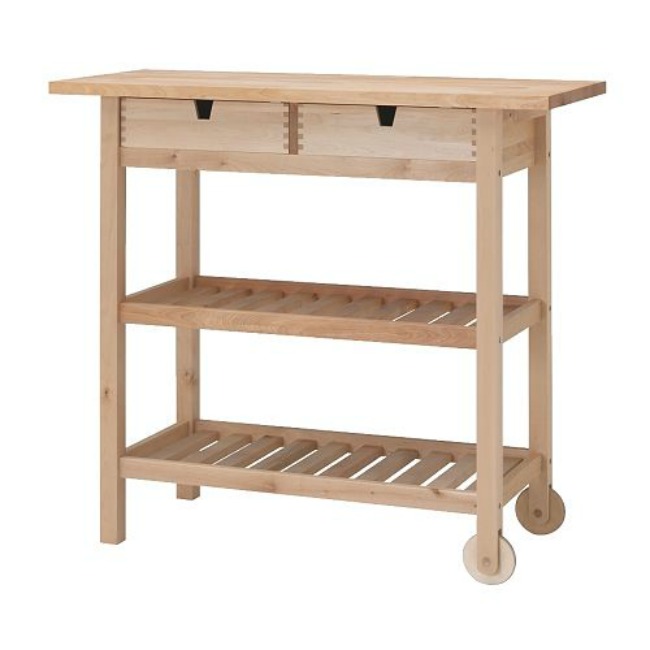
We have had this Ikea Forhoja kitchen cart for years. It stayed in its original state for a couple of years, and I just oiled the top. Since that was several years ago, I don’t have a single photo to show you when it was in my kitchen.
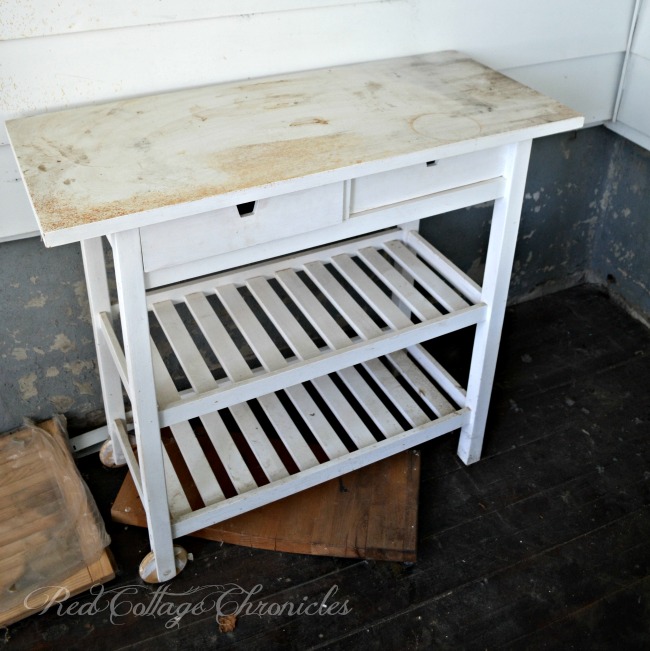
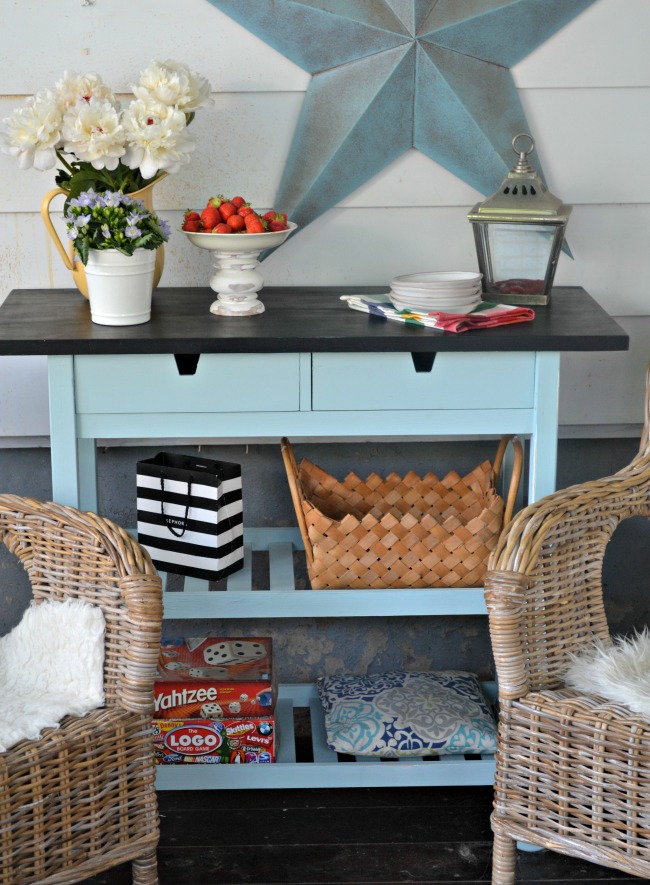
When we outgrew the storage space it provided for the kitchen I painted it white and put it out in our screen porch. We used it as kind of a sideboard/potting bench/beverage cart/catch-all. Over the winter we had a leak in the roof, which caused some water damage to the top.
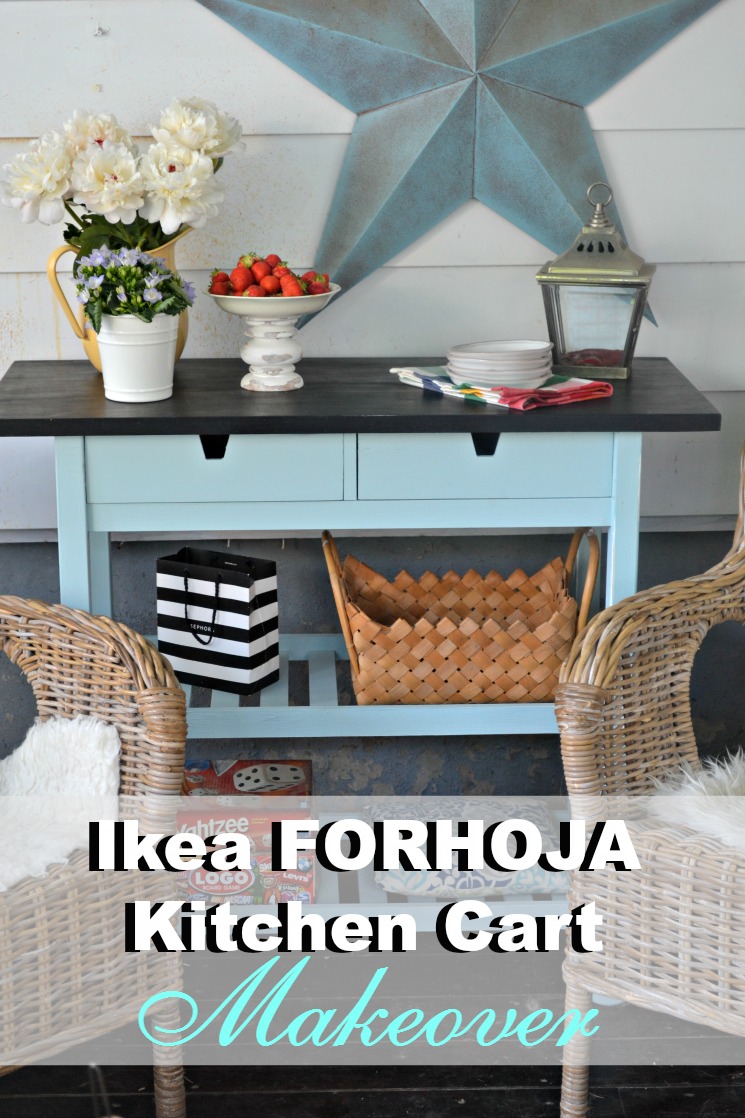
Still not wanting to part with it, it was time for an Ikea Hack – Kitchen Cart Edition! I decided to give it a little makeover and bring it back to life. Paint is my favourite way to inexpensively add style and charm to damaged or outdated piece.
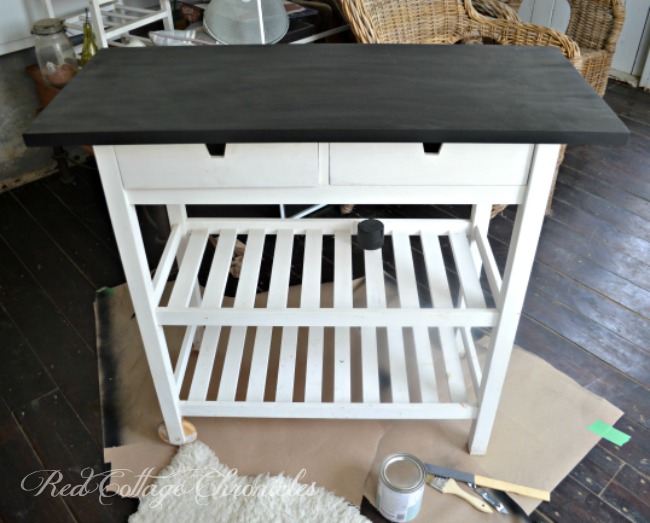
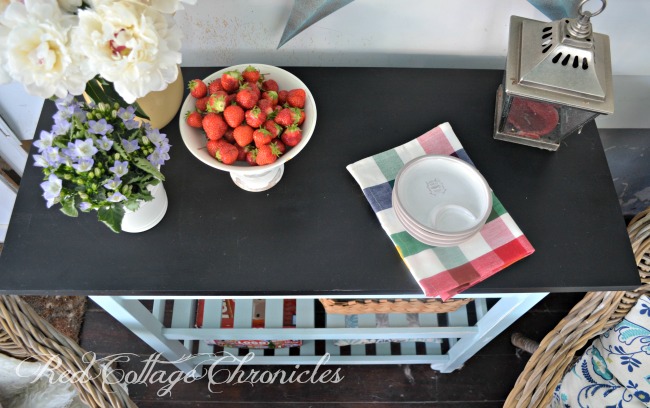
After taping off the base with some newsprint and painters tape, I sprayed the with top 3 coats of black chalkboard paint. It was just a can of chalkboard spray paint – no fancy sprayer required! I find that by spraying 3 or 4 light coats you can achieve more even coverage than only one thicker coat.
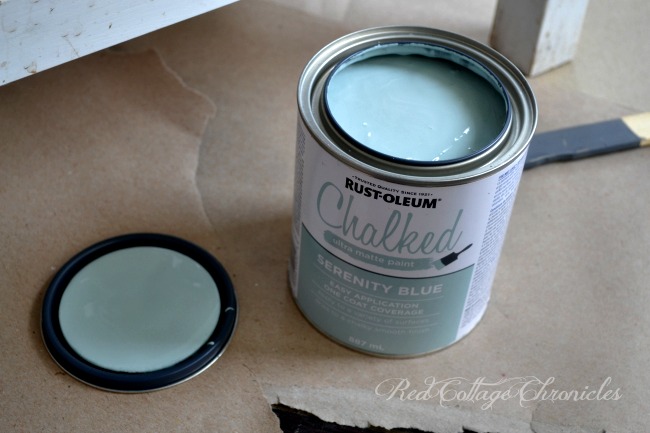
The base is painted with 2 coats of chalk paint called Serenity Blue. I had forgotten how much I dislike painting this cart. All those slats. Ugh! I got the base finished in a day because I knew that if I didn’t keep at it, I wasn’t confident I would ever finish!
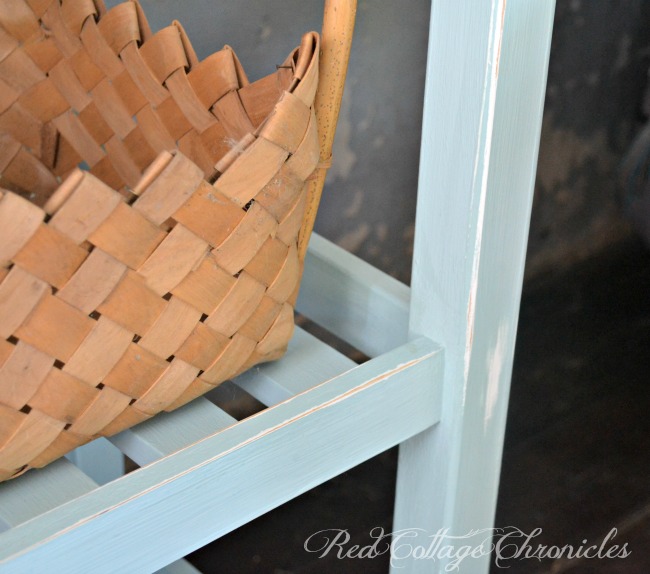
I gave some of the edges a sanding to expose the white paint and even bare wood underneath, giving it a tiny bit of a distress look.
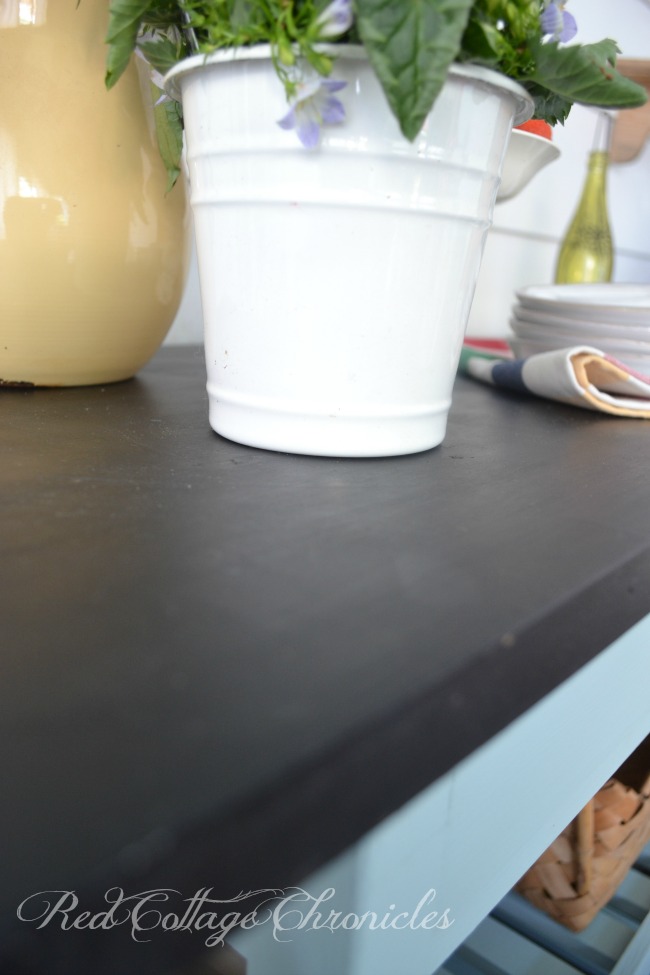
The entire piece was finished with clear paste wax. Four coats on the top, and one coat on the base. I wanted the top to be extra durable because I know it will continue to get a lot of use.

This weekend it was used to hold some pretty flowers and fresh fruit. I moved one of the candle sticks turned “cake stand” from the kitchen to hold some fresh local strawberries to nibble on. Some little plates, napkins and a candle to light as the evening rolled around.
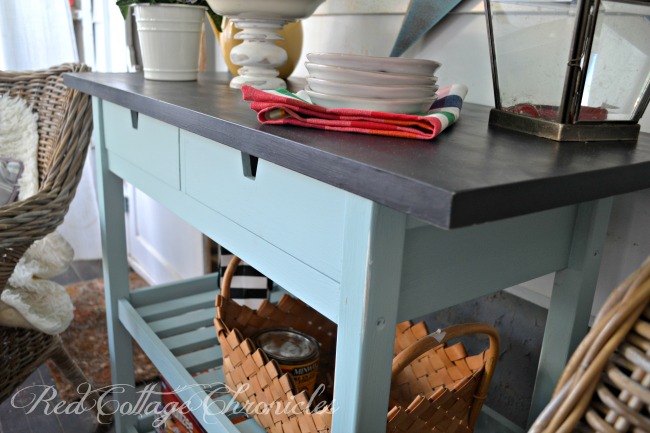
The drawers will hold extra napkins and plastic utensils, kitchen shears, string, and other odds and ends I am always needing to run into the house to get.
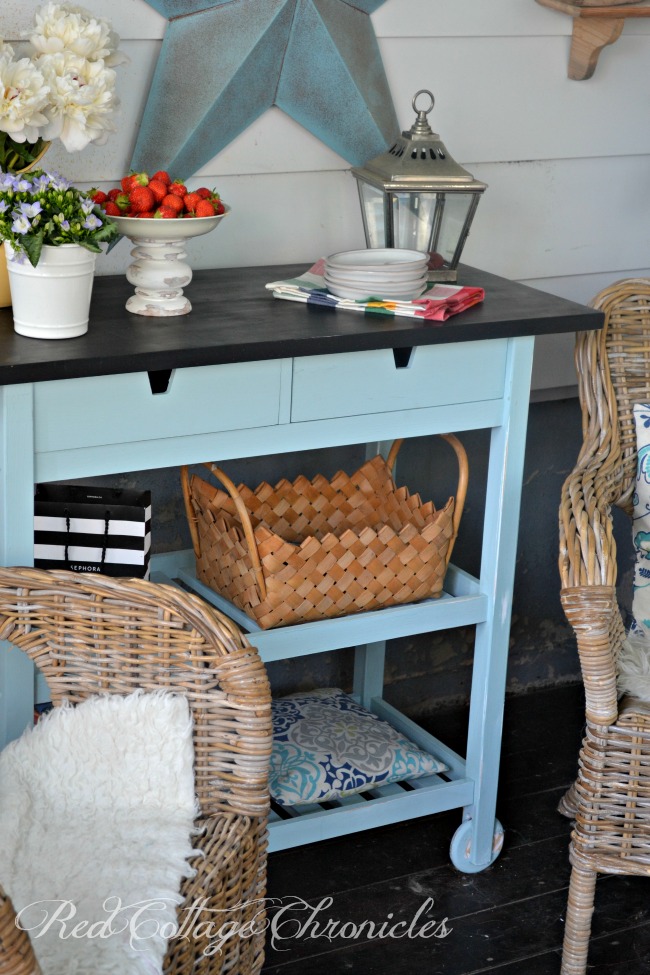
As much as those slats are a pain in the behind to paint, They provide extra storage for my really fancy Sephora clothes pin bag, a catch-all basket, some board games and cushions.
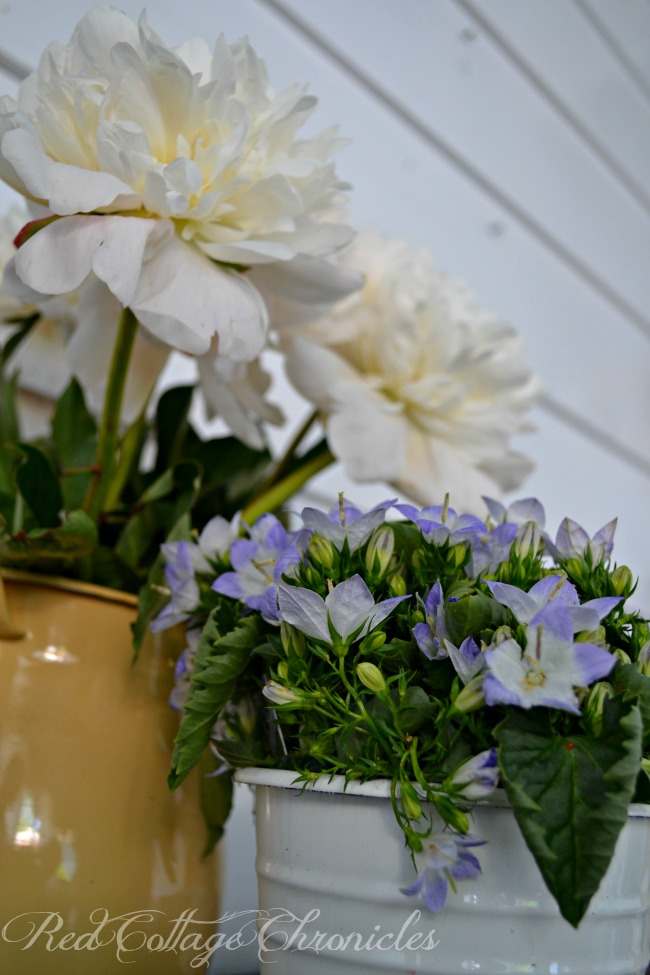
The flowers at the market where so pretty, I couldn’t resist picking up a few. Since my Peonies won’t be open for a another few days I treated myself to a bunch of white ones. I will add in a few of my pink ones as they start to open up.
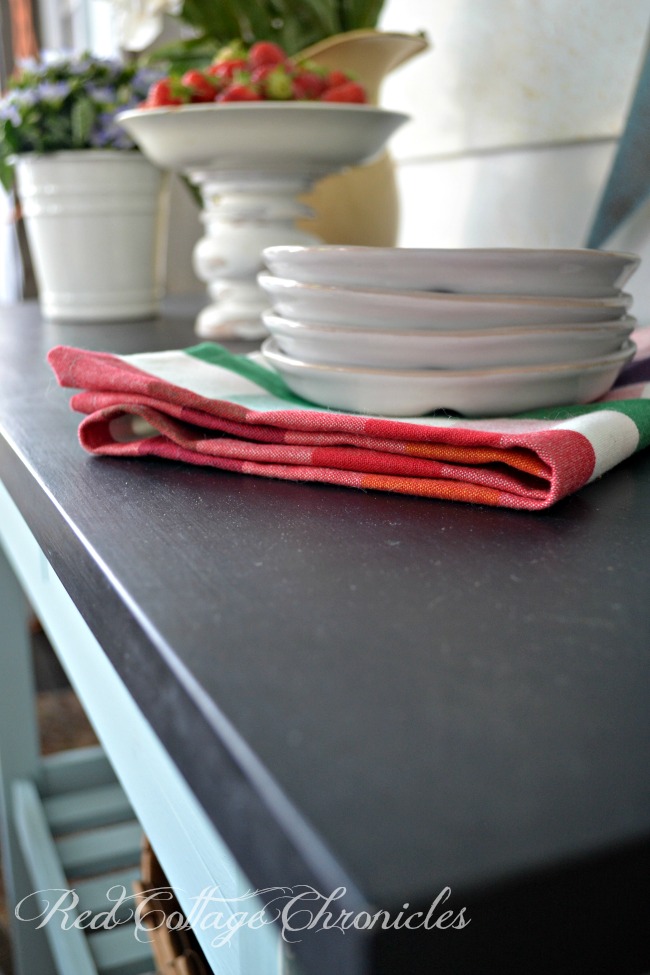
I am loving the sheen the 4 coats of wax gives the top. Not to mention the protection it provides from spills. It does remind me of soapstone a little bit.

I was tempted to have Tim replace the drawer fronts with solid pieces so I could add some fun knobs, but I didn’t want to make it more difficult than it had to be. I really don’t think any knobs are necessary anyway!
I love how it looks now, and already have in mind a dozen ways I will use it over the summer!
So, what do you think? Do you prefer the raw wood look or the painted version?
Until next time….


You have created a ‘new’ and gorgeous piece of furniture! Do I prefer raw wood or painted? I like both kinds but I think the update you did is spectacular!
It’s perfect now for sitting outside with a cup of tea, coffee, or wine on a beautiful morning or evening, providing just the spot to put your drink.
And I love that you’ve tucked away string and scissors inside the drawers. I’m constantly having to make a return trip inside to grab a pair of scissors to dead-head my annuals.
What a great idea to reuse a piece by revamping it. I’m very impressed by the results!
Thank you Jan! I am the same as you, I really liked the raw wood in the kitchen, but painting it just works better for the space it is in now 🙂
Thank you Heather! It certainly brightens the room up 🙂
LOOKS GOOD
Thanks Sabina 🙂
I believe I love the painted version!
Slats and spindles are so much work aren’t they?
Thanks Lisa! Next time I come up against slats I am breaking out the sprayer!!
That turned out so cute! I just love the color you chose!
Thank you Carlee! I think this is my new favourite colour 🙂
Wow! What a difference! I love that color. The whole thing is beautiful!
Thank you Michelle! I am loving the color too 🙂
I do like your painted version. It really personalizes it and makes it yours. Your styling is very pretty also.
Thanks a bunch! It is getting all kinds of uses these days 🙂
How pretty! -Marci @ Stone Cottage Adventures
Thank you Marci!!