Be Still My Heart Valentine T-Shirt
Today was the perfect for crafting! Better late than never, but the weather outside is frightful and the fire is so delightful! And, if you’ve no place to go then get busy on crafting! How cute is this Be Still My Heart Valentine t-shirt!?

I am joining five talented bloggers who all seasoned Cricut creators! The links to their projects are below! I am definitely the new kid on the block, but I am actually happy to be sharing projects from a beginners point of view!
And, this is a very easy Valentine Cricut Maker project that you can create in under 30 minutes. In fact, I didn’t plan on participating in this group but last evening my daughter decided she wanted me to make her a Valentine t-shirt.
You will need:
- plain t-shirt
- Cricut cutting machine
- Cricut Everday Iron On Vinyl in colour of your choice (we used pink)
- Cricut Easy Press, or an iron
- weeding tool
I used Cricut Design Space to create the graphic, You can find the transfer here, but here are the simple directions if you decide you want to make your own design sometime.
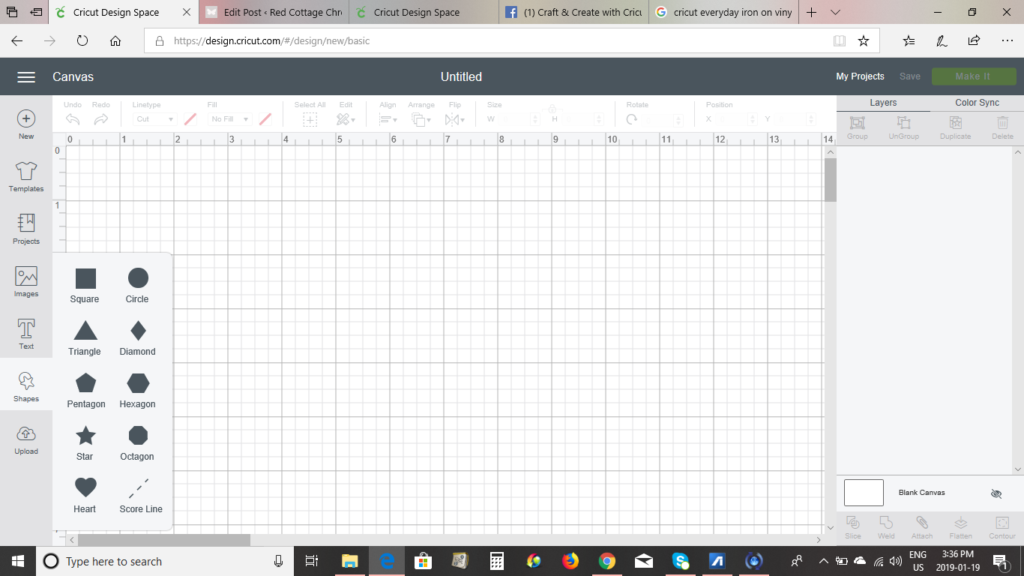
Create a “new” cricut project. Click on the ‘shapes’ icon on the left side of the screen. Click on the heart shape.
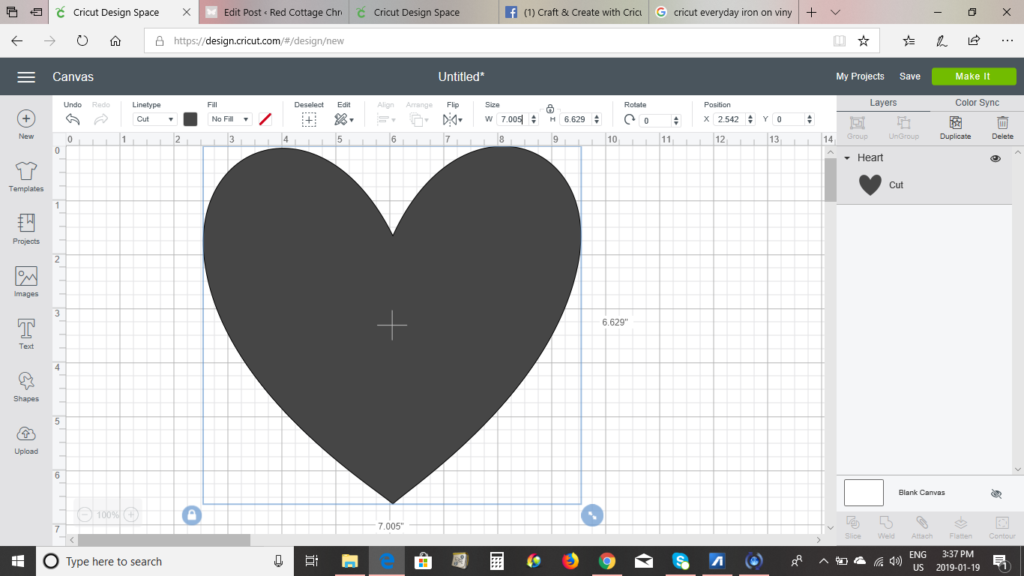
Resize the heart to your desired size by putting the curser over the double ended error at the bottom right of the box and moving it in our out to make it smaller or bigger.
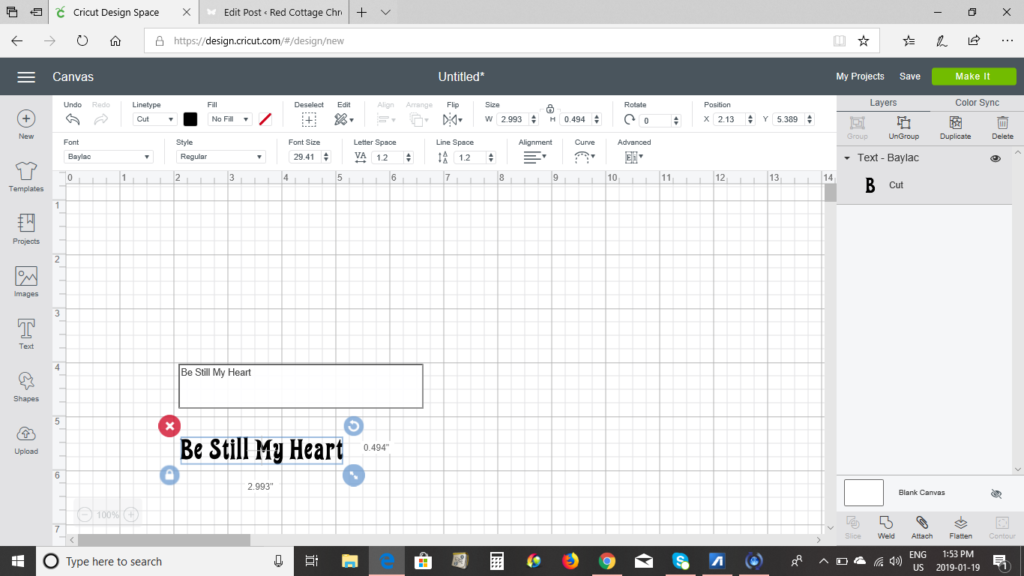 To add text, click the text icon on the left side. A text box with pop up. Type your text into the box and it will show up in blue box where you can customize the size the same way you did the heart. To change the font simply click the dropdown box located in the bottom row of the tool bar. I choose a font with a retro vibe.
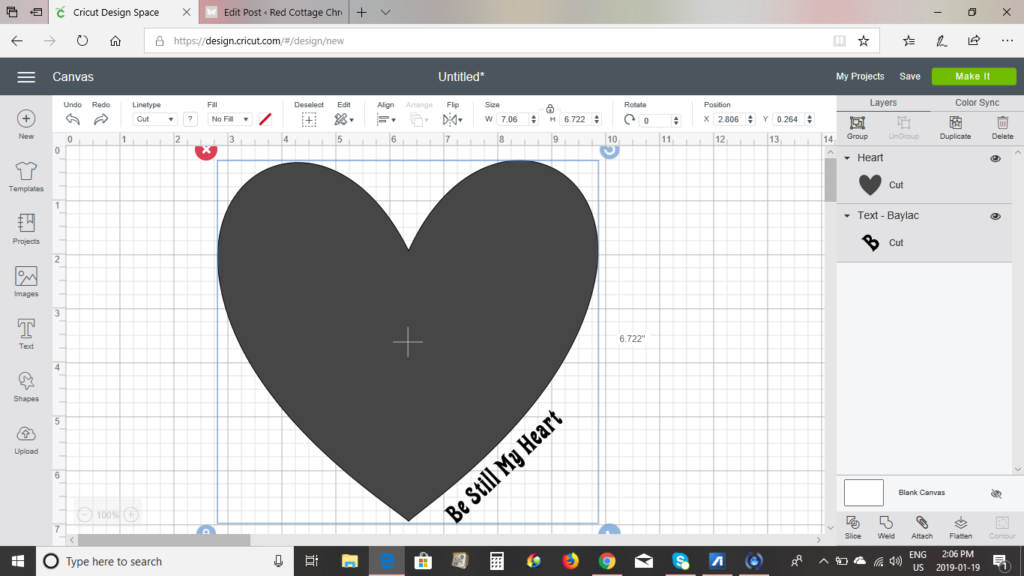 Reposition the text to align along the lower edge of the heart. When you are happy with the placement, simply click outside of text box to lock text into place. Next, click the Select All + icon in the tool bar and a large box will surround both the heart and the text.
Click the Weld icon in the bottom right of the screen to join both the heart and the text together into one image.
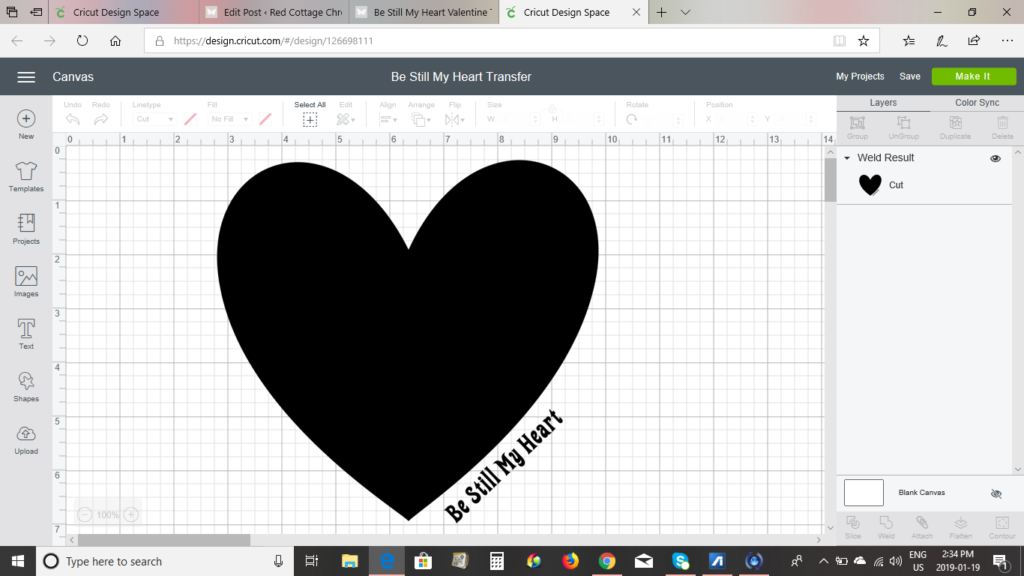
You will notice the box has now disappeared and the combined images are darker. You will also see the Weld Result in the right hand column. You can now be sure that both the heart and the text will cut on one mat.
Next, click Make It in the top right and follow the on-screen prompts!
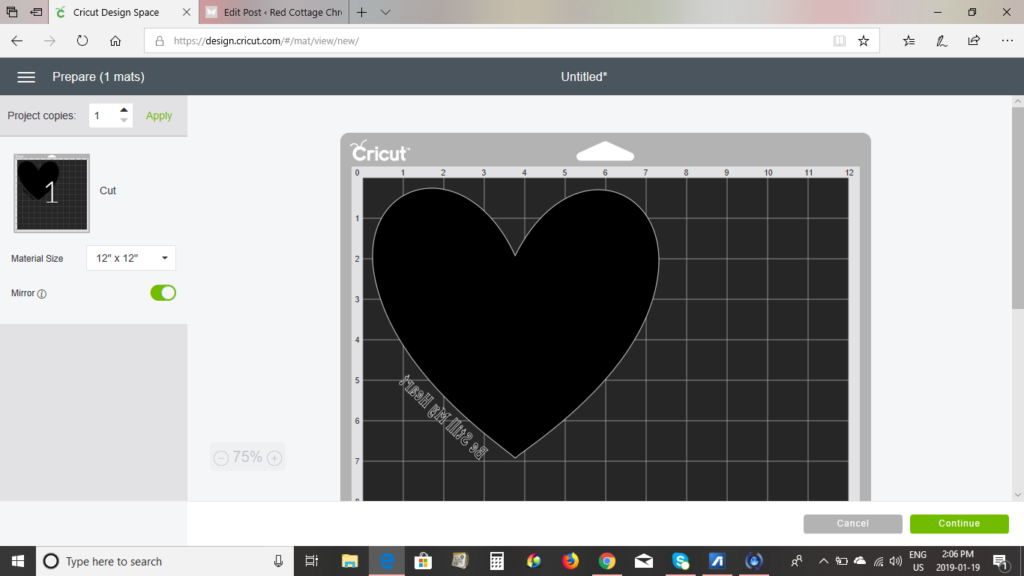
First, be sure that your image is mirrored when using iron on vinyl. You can see in the image above, the left column indicates “Mirror On”. You can simply click edit to change this if it is not.
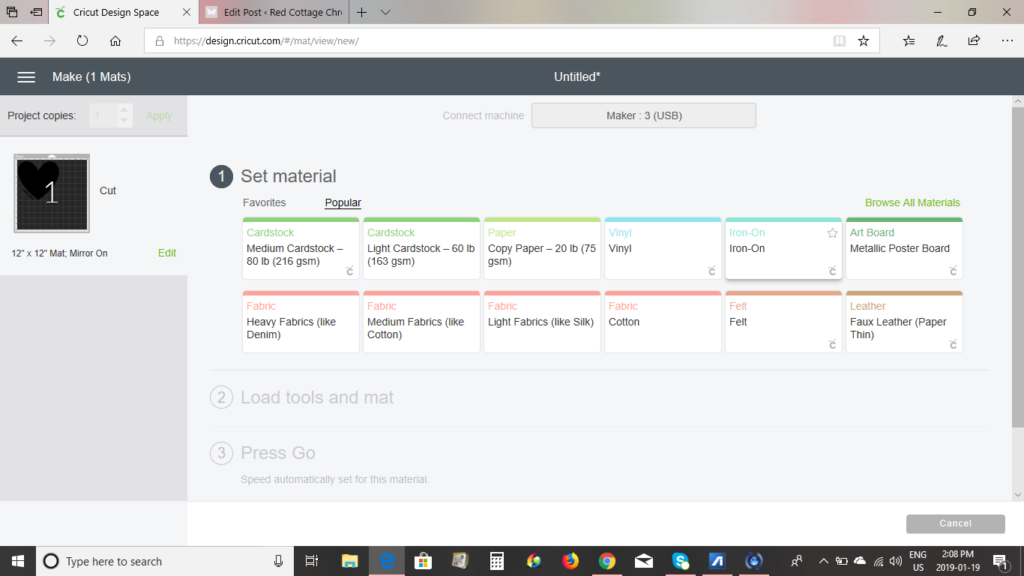
Set your material. A list of the most popular materials will show automatically. Click Iron-On and continue to follow on-screen and on-machine prompts.
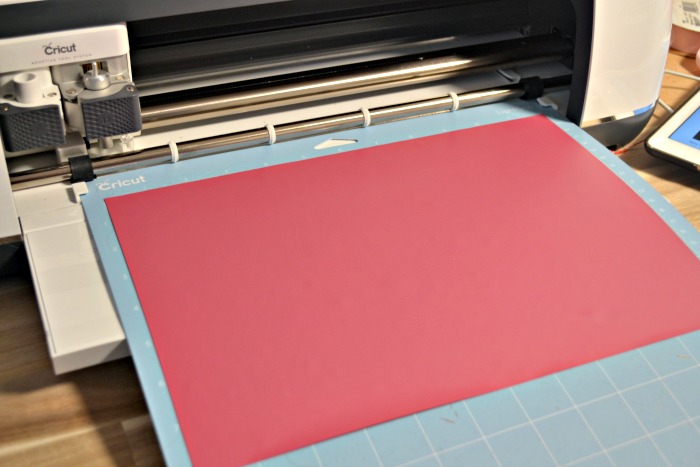
Place the iron on vinyl SHINY SIDE DOWN onto the light rip mat and load mat into the Cricut Maker when prompted, press the flashing C, and remove when prompted with the flashing arrows
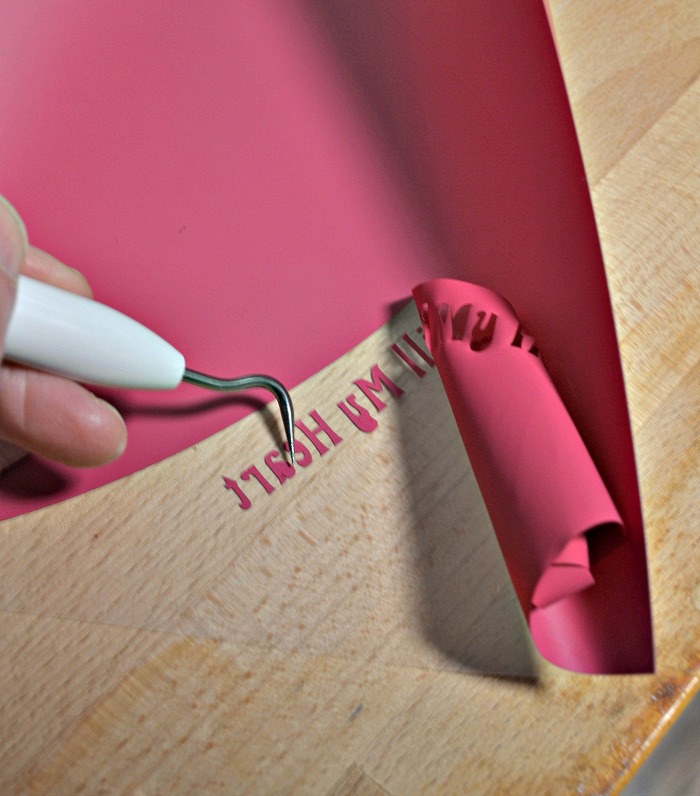
When cutting is complete, remove the vinyl from the mat and weed out the negative vinyl
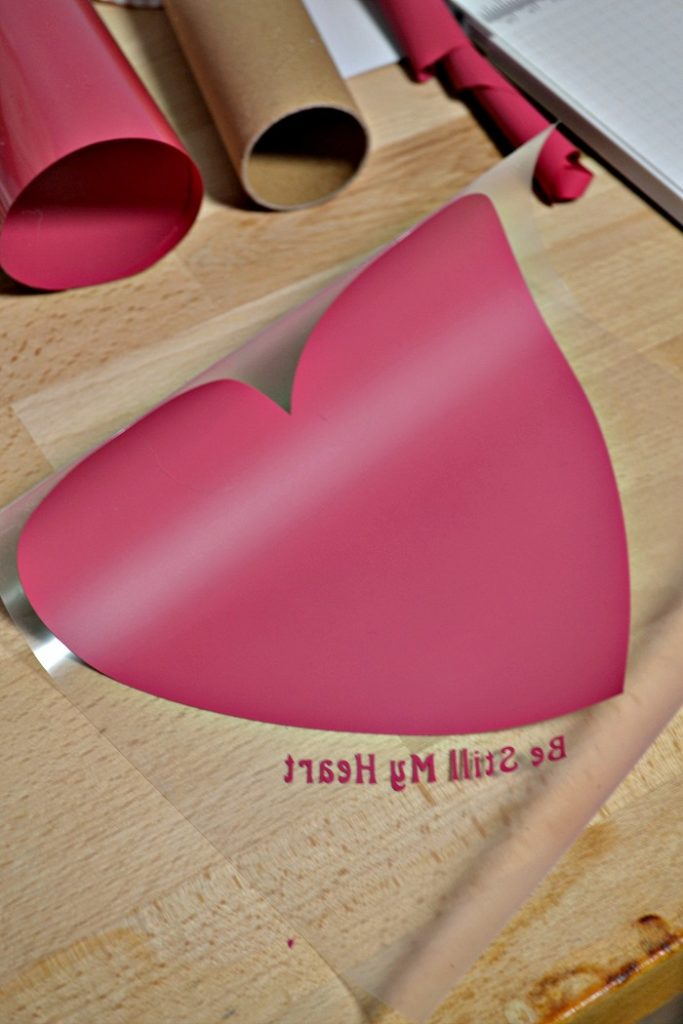 leaving the finished transfer in place.
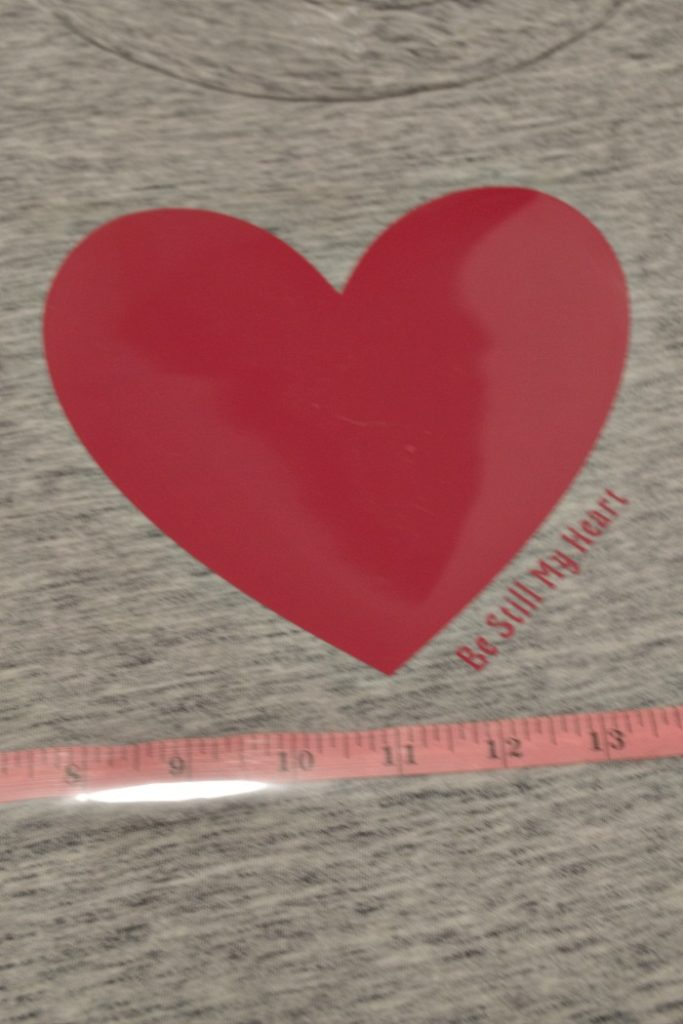
Position image, SHINY SIDE UP, onto your t-shirt.
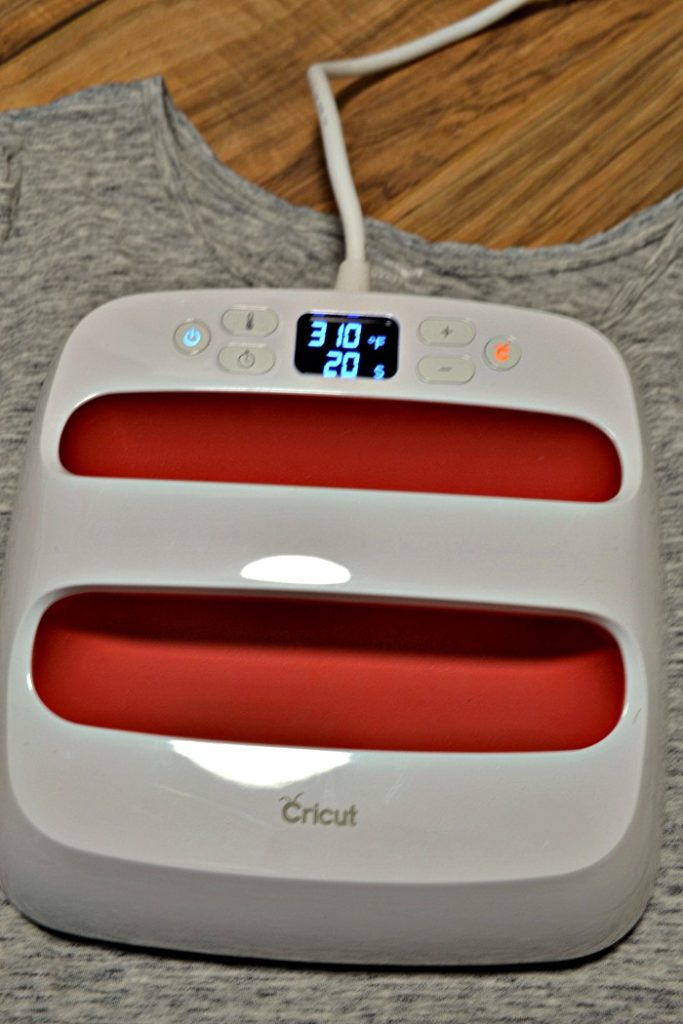
For poly/cotton blend t-shirts heat Easy Press to 330. Press image for 30 seconds, turn the shirt over and press from the back for an addition 15 seconds.
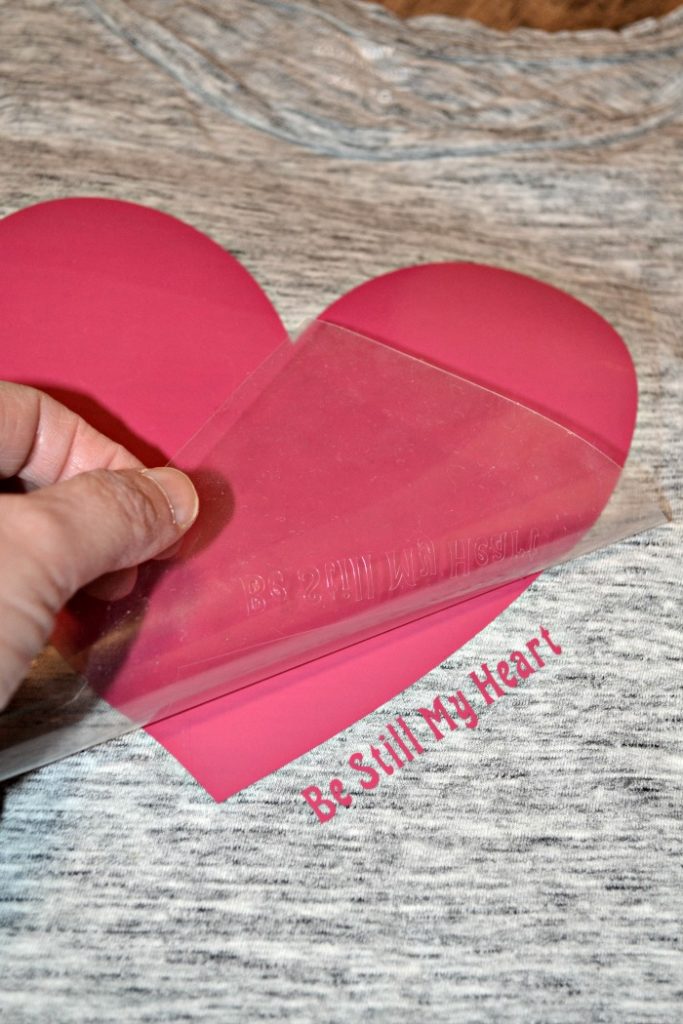
Peel off the shiny transfer sheet while still warm!

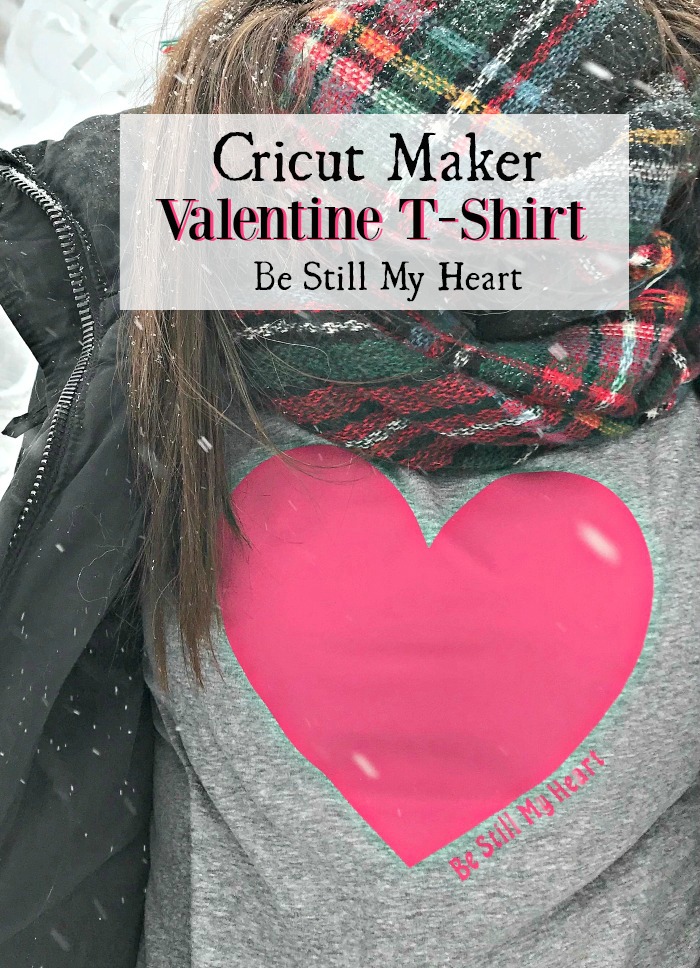
I think it turned out perfect, and Sam is really happy with it too!!
Now let’s see what my blogging besties have made for Valentine’s Day with their Cricut machines:

Be Still My Heart T-Shirt / Star Wars Valentine’s Cards / I Love You More than Coffee / Emoji Valentine’s Day Shirt
Until next time……


This is so cute, Maureen!
Thank you Mary Beth!
What a great idea! And how much do you love that new EasyPress?! I need to get one! <3