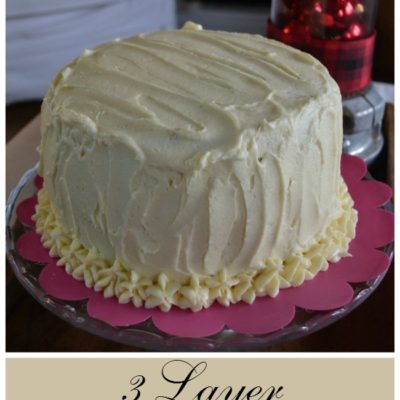
Three Layer Red Velvet Cheesecake

I really don’t know how it happened so fast, but our youngest daughter celebrated a special birthday recently! She is now officially a quarter of a century old! How is it that is possible when I only feel 25 myself!
She has always been our spirited child and that hasn’t changed one bit. She is on the go all the time! She is a dedicated and hard worker, loves animals and has one of the kindest hearts I know. She has made Tim and I so very proud!

She was such a little cutie pie, always exploring and pushing the limits with a grin that would melt your heart.

Just like her sister, she is extremely sentimental. For Father’s Day this year she planted a tree in the backyard for Tim. My mom has one in her yard that my dad had planted years before he past away. It has one lower branch that when the leaves are blowing my dad always told the kids it was waving at them! Sam had to find the exact same tree and we inspected every tree at the garden centre until she found one that was “waving” just like her Pampi’s tree! She then painted a little bird house for Tim to hang in the tree when it gets bigger. She inscribed the sweetest message on the bottom!

While part of me wishes she could stay at home with us forever, I know she is all grown up and ready to to fly the nest. She has started the exciting journey of house hunting. The house my dad grew up in right up the street from ours is for sale. Can’t figure out why she doesn’t want to live up the street from Mom and Dad at her age!

We celebrated her birthday with the family and Tripper made sure to inspect each and every gift!
When I asked her what kind of cake she wanted for her birthday, she asked for one of those cakes you see in a restaurant. You know, the ones that are made up of 4 or 5 different cakes all nicely sliced and divided by little pieces of parchment!
Yeah, not going to happen!
Then she mentioned maybe a cheesecake, or maybe a regular cake, or ice cream cake!
We decided on a layer cake made up of red velvet cake and cheesecake with a fluffy butter cream frosting.

At first I thought to myself, how on earth am I going to have time to do this. But, then stopped myself in my tracks as I realized everything else I thought I had to do could wait. Some things are just more important!
A basic cheesecake is really easy to make, and I even gave myself permission not to feel guilty about using a Duncan Hines Red Velvet cake mix for the other layers despite all the recipes I came across on line.
A few tips
- Cheesecakes don’t like drastic temperature changes. This is one reason they might crack. To help prevent cracking, turn the oven off when the centre of the cheesecake is just slightly jiggly, and leave the oven door ajar letting the cheesecake sit in the oven for about three minutes before removing it.
- When the red velvet cake layers are cool be sure to trim them flat with a serrated bread knife as you want your layers to be level.
- One tip I took from a recipe I came across was to freeze the cheesecake layer. This made it really easy to assemble and frost.
- Chances are your cheesecake layer is going to be bigger than your cake layers. After you remove the cheesecake from the freezer wait about 5 minutes and then using the cake pan you baked the cakes as a guide, using a sharp knife cut the cheesecake layer to fit.

In the end this turned out to be one of the easiest cakes I have made! The cheesecake was baked the day before and popped into the freezer. I used a deluxe Duncan Hines Red Velvet cake mix and it took no time at all to get it into the oven. Whip up some frosting and away you go!
Despite the little shortcut I took this 3 layer red velvet cheesecake is so decadent and delicious. The recipe looks like it is complicated but it really is just three easy steps.
- Make cheesecake
- Make red velvet cake
- Prepare frosting and frost the cake
I can’t wait to try other flavours when birthdays start up again in the spring!
My inspiration recipe can be found here, if you prefer to make the entire cake from scratch!
Until next time….
Maureen

Red Velvet Cheesecake
Ingredients
- 3 pkgs cream cheese
- ¾ cup sugar
- ½ tablespoon lemon juice
- 2 large eggs
- ½ cup sour cream
- 1 boxed red velvet cake mix + ingredients to prepare
Frosting
- 1 ½ pkgs cream cheese
- ¾ cup butter softened
- 1½ teaspoons pure vanilla extract
- 3 cups confectioners' sugar sifted
Instructions
- Preheat oven to 325 degrees.
- Spray a spring form with Pam non-stick spray. Cut a circle of parchment paper to line the bottom and then spray the parchment with a bit more non-stick spray and then wrap the bottom half of the pan with two layers of heavy duty tin foil. Set aside.
- Bring a kettle of water to boil and then remove from heat
- In the bowl of electric mixer beat cream cheese until light and fluffy, scraping the sides of bowl as required
- Add lemon juice and beat to combine
- Add the eggs, one at a time, making sure each egg is well incorporated before adding the next and scraping down the sides of the bowl in between each addition.
- Add sour cream and beat well until combined and batter is smooth.
- Transfer batter to prepared spring form pan and place the pan in a large roasting pan.
- Pour the hot water from the kettle into the roasting pan until it comes about half way up the sides of the springform pan.
- Carefully place in the oven and bake for approximately 60 minutes, or until just set in the centre.
- Turn off oven, open the door and leave the cake to rest in the oven for 30 minutes before removing it from the roasting pan and onto a cooling rack. Run a knife around the edges and allow to cool completely and then run the knife around one more time before releasing and removing springform.
- Carefully place a flat plate onto the cheesecake and flip it over so that the cake is now on the plate. Remove the parchment paper and wrap in plastic before placing in the freezer.
- Prepare red velvet cake according to package directions in 2 8" round baking pans and allow to cool completely. Level the layers with a serrated knife.
- Prepare frosting by combining cream cheese, butter and vanilla in the bowl of electric mixer, beating for about 2 minutes on high until light and fluffy. Add confectioners' sugar and beat on low until combined and then increase speed to medium/high and beat for about 3 minutes.
To Assemble
- Remove cheesecake from freezer and trim to fit if larger than your cake layers.
- Place one red velvet layer on cake plate and add a light layer of frosting.
- Add cheesecake layer, and again add a light layer of frosting.
- Place final layer of red velvet cake on top of cheesecake layer.
- Carefully frost the entire cake with a generous amount of frosting and place in refrigerator until ready to serve.


This does look absolutely decadent! I’m 59 now and I remember when my grandmother used to buy a red velvet cake from the bakery at the old Eaton’s store in downtown Winnipeg. It also had the cream cheese frosting on it. I thought it was absolutely the best thing I had ever tasted until I found out the ingredient that turned the cake red (some kind of insect!!). Well, I thought some more and decided grandma must be wrong because nothing that tasted so good could possibly have crushed bugs in it.
Well, when I got older I discovered grandma was right but I was past the point of worrying since grandma had said it was what they ‘USED’ to use before they had red food colouring. Thank heaven!!
When I’m back on my feet I will surely try your idea out for myself. I used to make all sorts of cheesecakes so I’ll pull out a nice ‘plain’ one and even use a mix for the red velvet. Between you and your daughter, you’ve come up with a great idea. Thank you!!
I made this for a Christmas party 3 years ago… I also froze the cheesecake layer and found it worked better.
Maybe I will try this again this year… everyone loved it 🙂
I am so glad I read the tip about freezing it first. It was a big hit 🙂